
Launching Amazon EC2 Instances via Console
In this guide, we are going to launch EC2 instances in the public and private subnets


Prerequisites
Check my previous guide on creating Amazon VPC resources
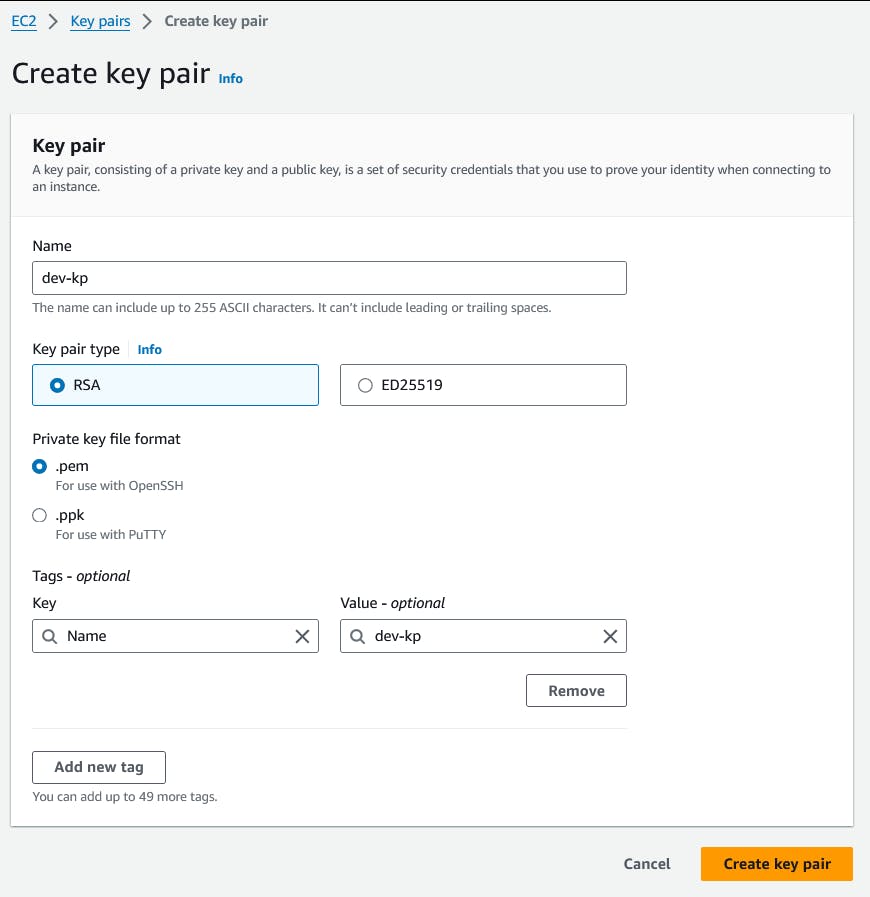
Key Pair
Create a new key pair for connecting to EC2 instances
Name: dev-kp
Key pair type: RSA
Private key file format: .pem
Security Groups
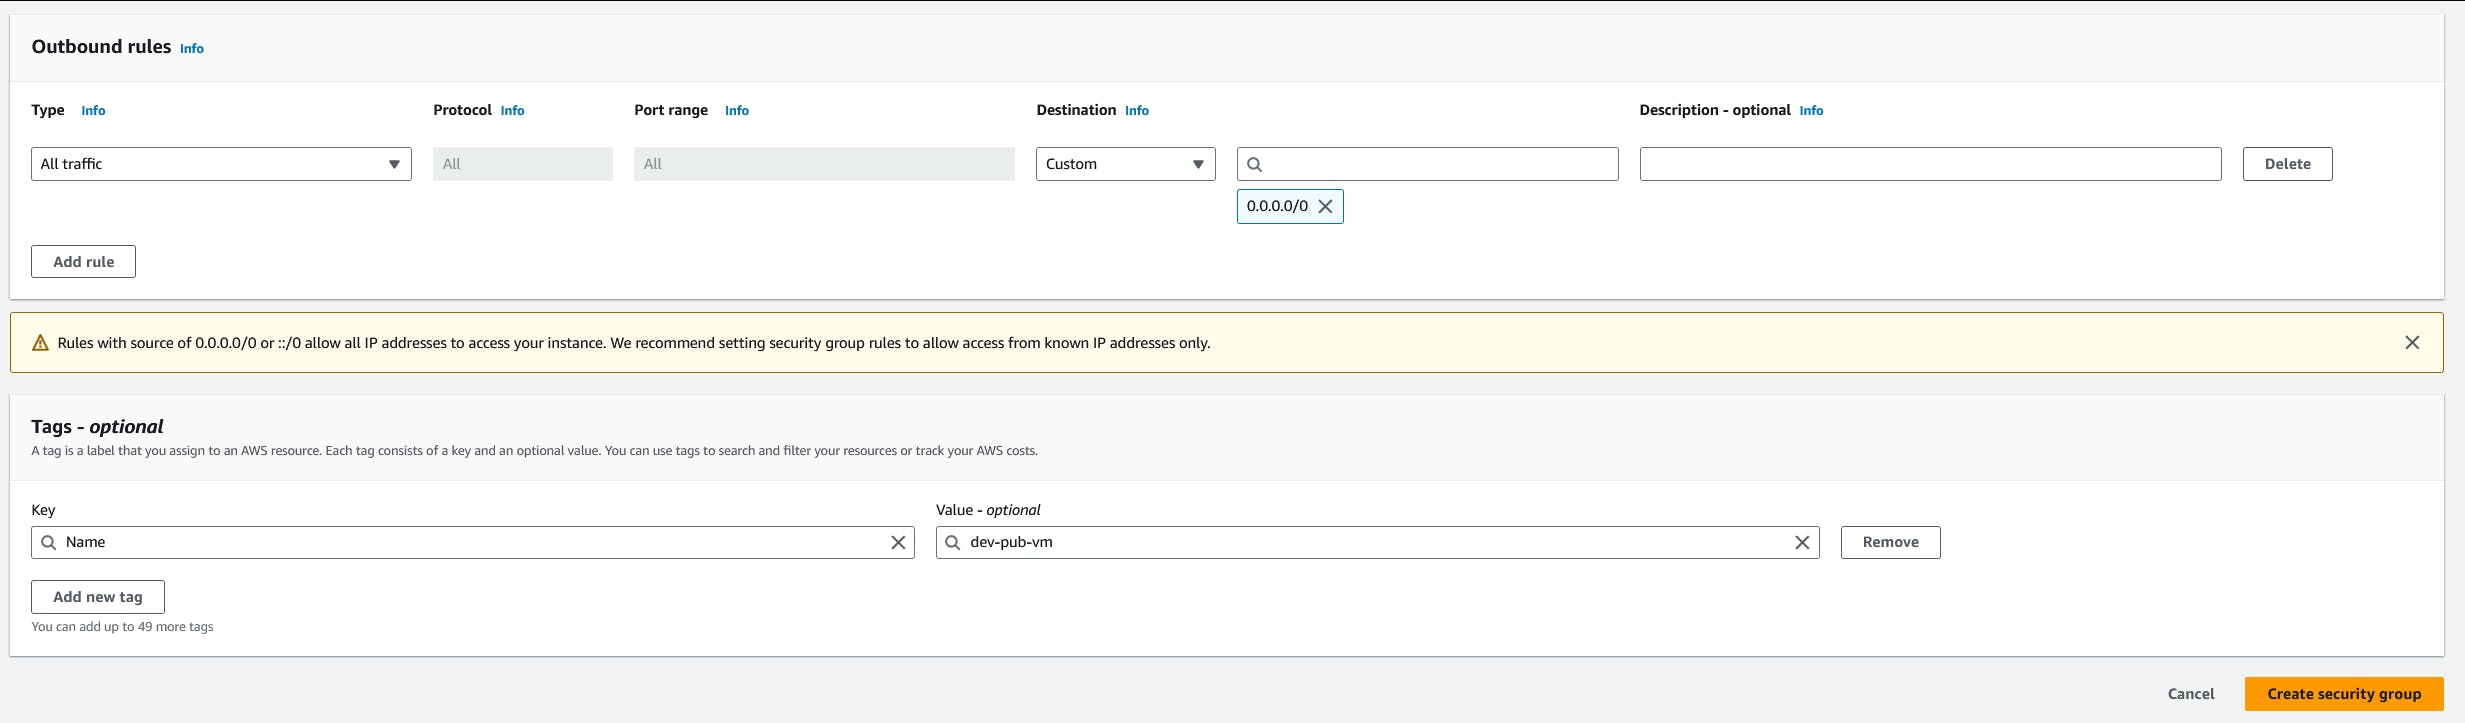
Public EC2
Create a security group for Public EC2 instance allowing SSH connection from anywhere
You may need to restrict SSH connection only from your corporate VPN
Security group name: dev-pub-vm
Description: dev-pub-vm
Inbound rules: SSH from anywhere
- 0.0.0.0/0

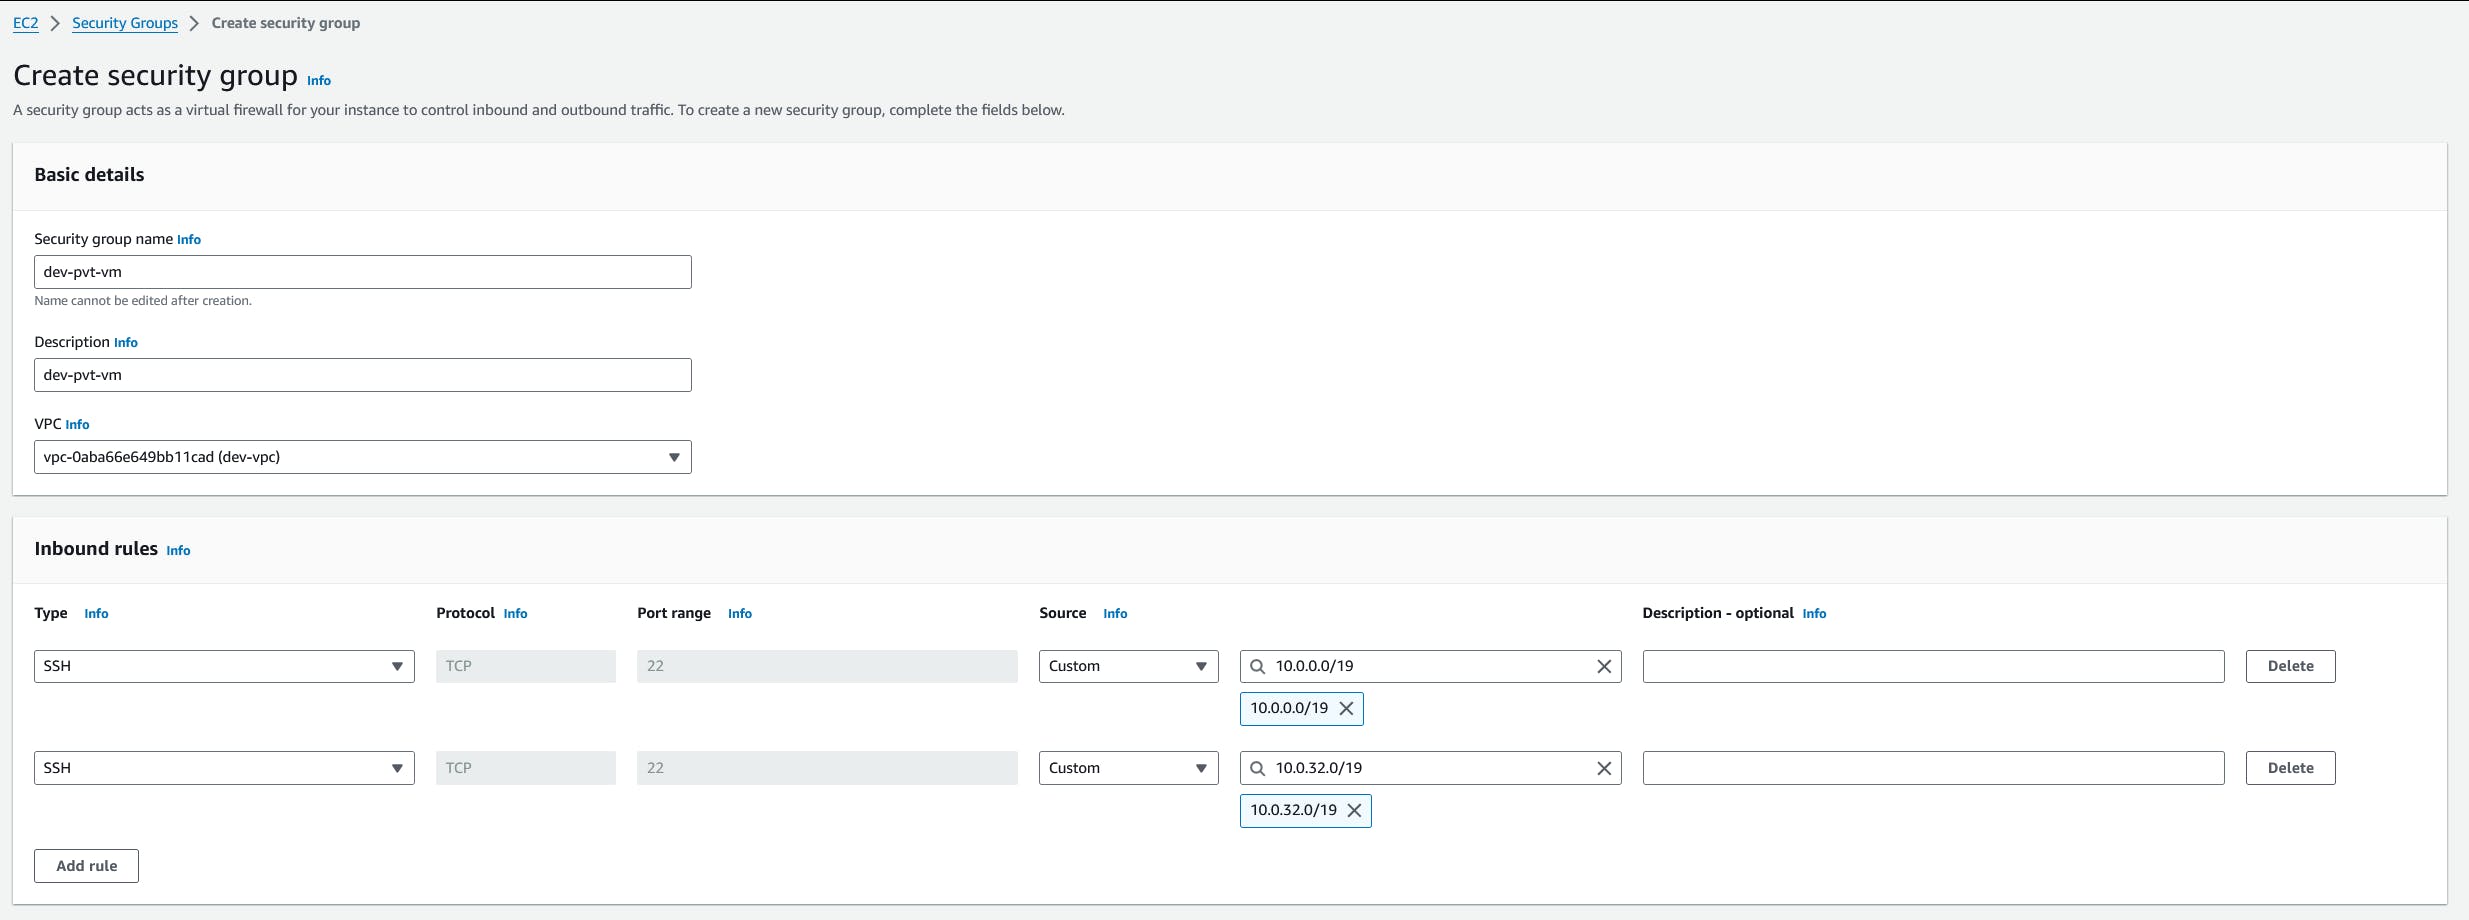
Private EC2
Create a security group for Private EC2 instance allowing SSH connection from only Public subnets
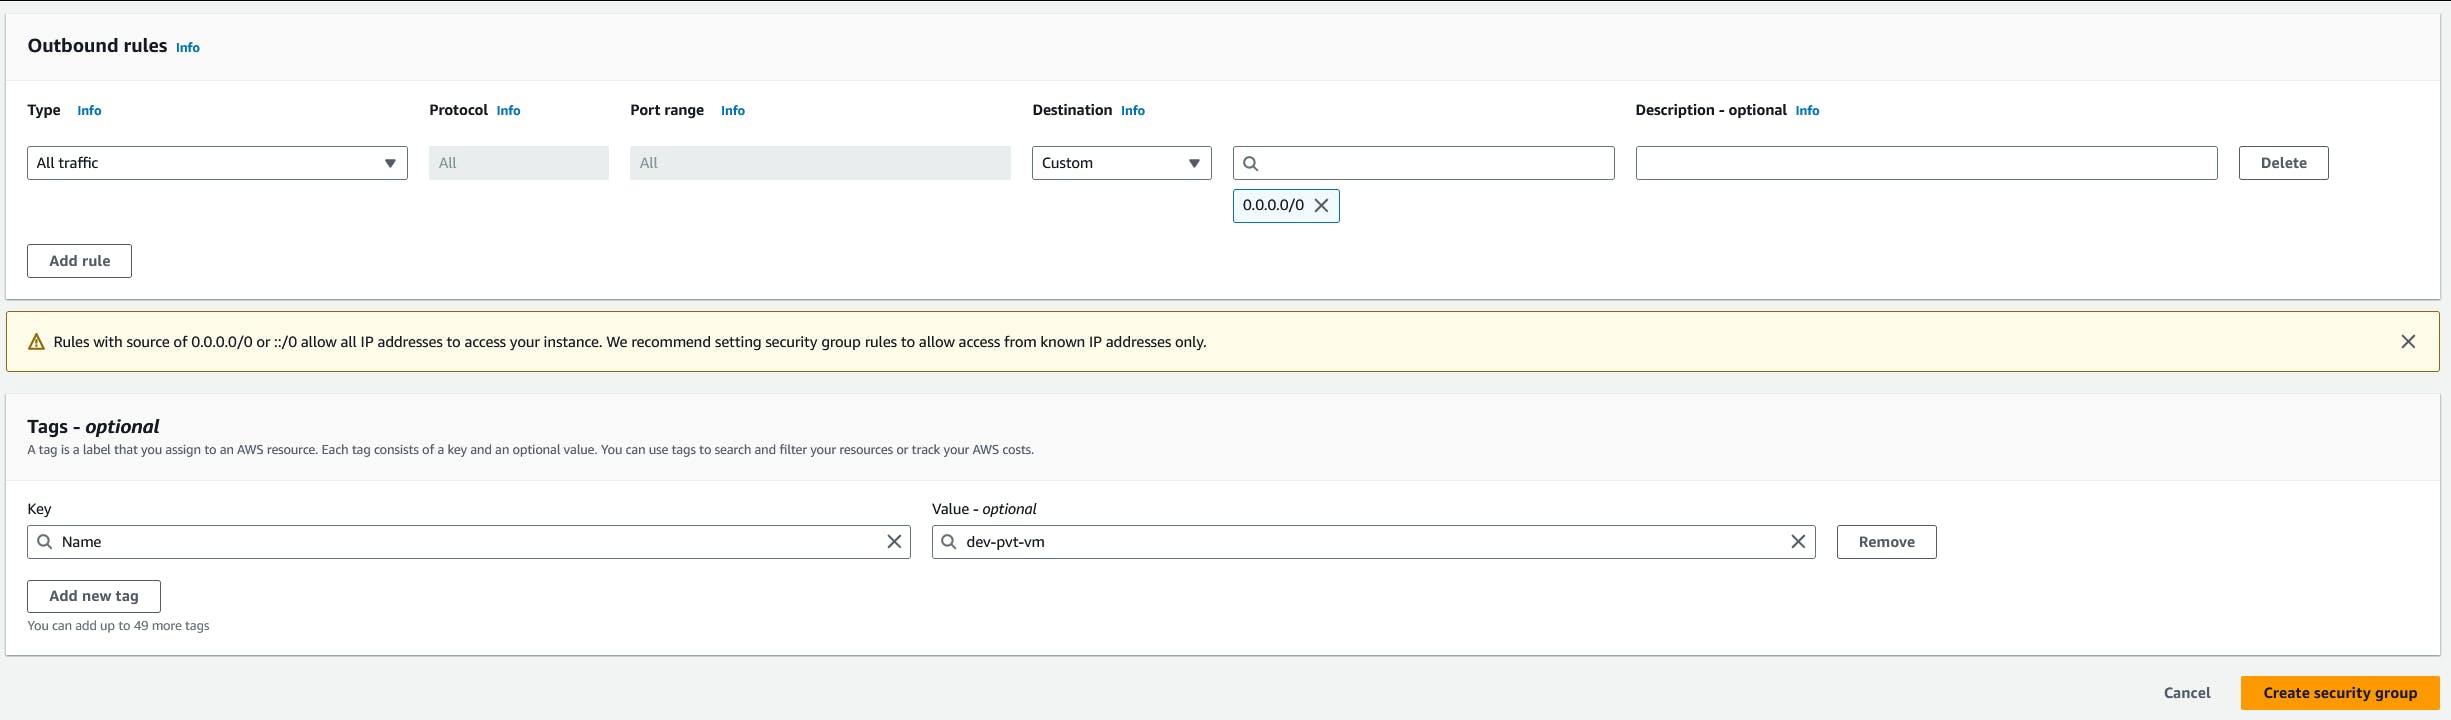
Security group name: dev-pvt-vm
Description: dev-pvt-vm
Inbound rules: SSH from public subnets
- 10.0.0.0/19
- 10.0.32.0/19
EC2 Instances
Public EC2
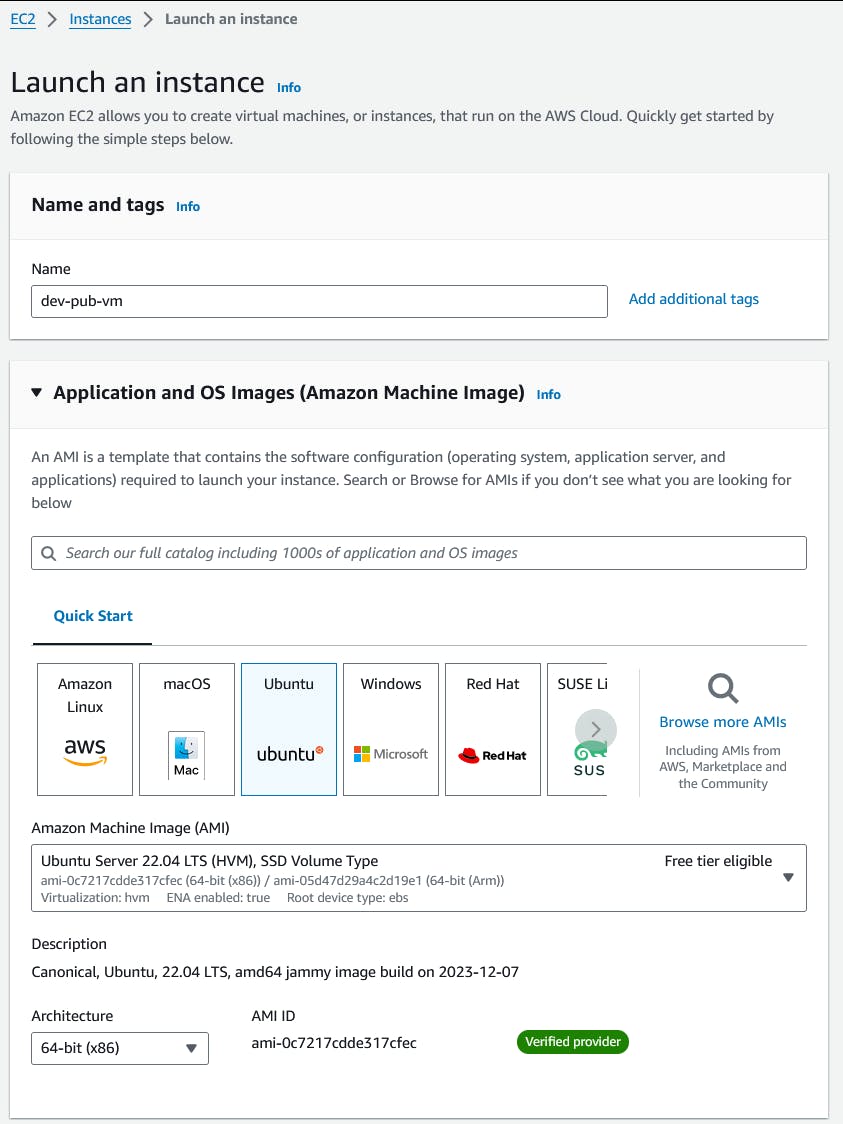
Create a new instance by clicking the Launch an instance button
Name: dev-pub-vm
AMI: Ubuntu 22.04 LTS
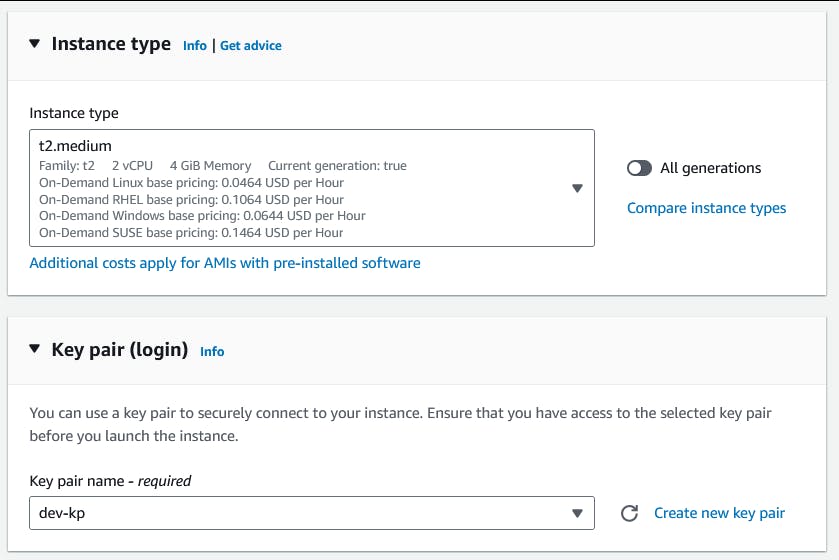
Select instance type and Key pair for our instance
Instance type: t2.medium
Key pair: dev-kp
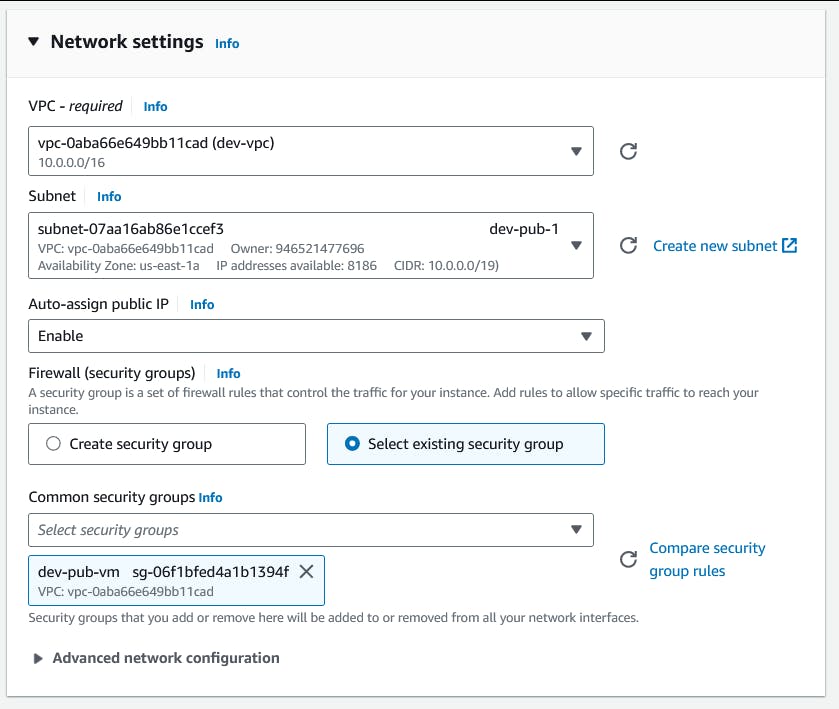
Configure Network settings for our instance
VPC: dev-vpc
Subnet: dev-pub-1
Firewall (security groups): dev-pub-vm
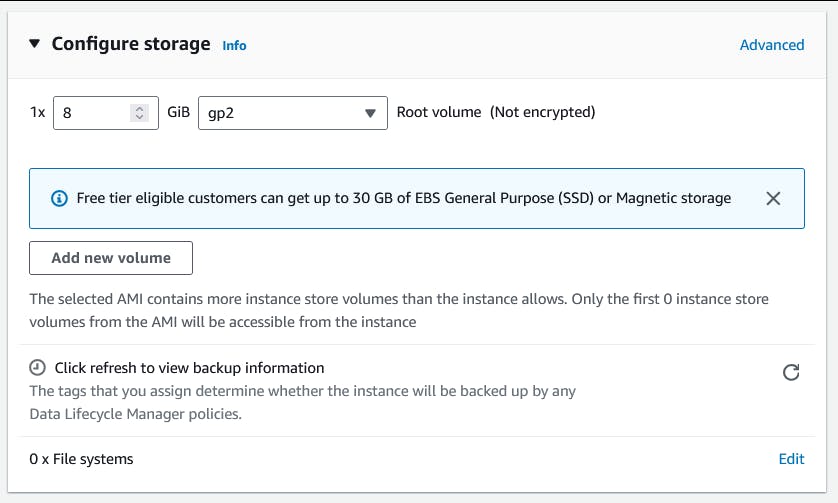
For configuring storage, proceed with the default values
Once everything is ready, click on Launch instance button and our instance will be created
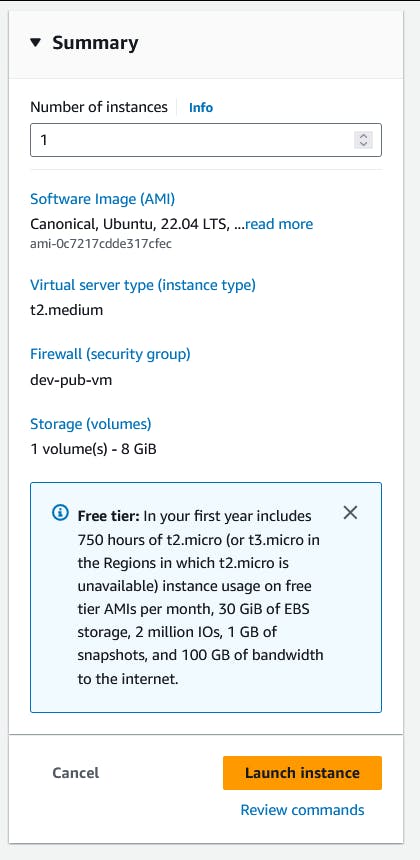
Verify the instance is up and running

Copy the public IP of the instance and connect to it using SSH
$ chmod 400 dev-kp.pem

$ ssh -i dev-kp.pem ubuntu@3.235.42.161
ubuntu@ip-10-0-7-213:~$ ping -c 1 google.com
PING google.com (142.251.16.138) 56(84) bytes of data.
64 bytes from bl-in-f138.1e100.net (142.251.16.138): icmp_seq=1 ttl=55 time=1.99 ms

--- google.com ping statistics ---
1 packets transmitted, 1 received, 0% packet loss, time 0ms
rtt min/avg/max/mdev = 1.994/1.994/1.994/0.000 ms
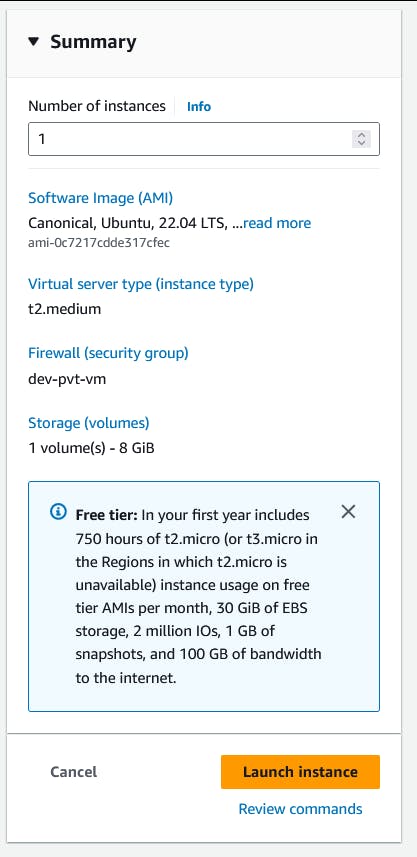
Private EC2
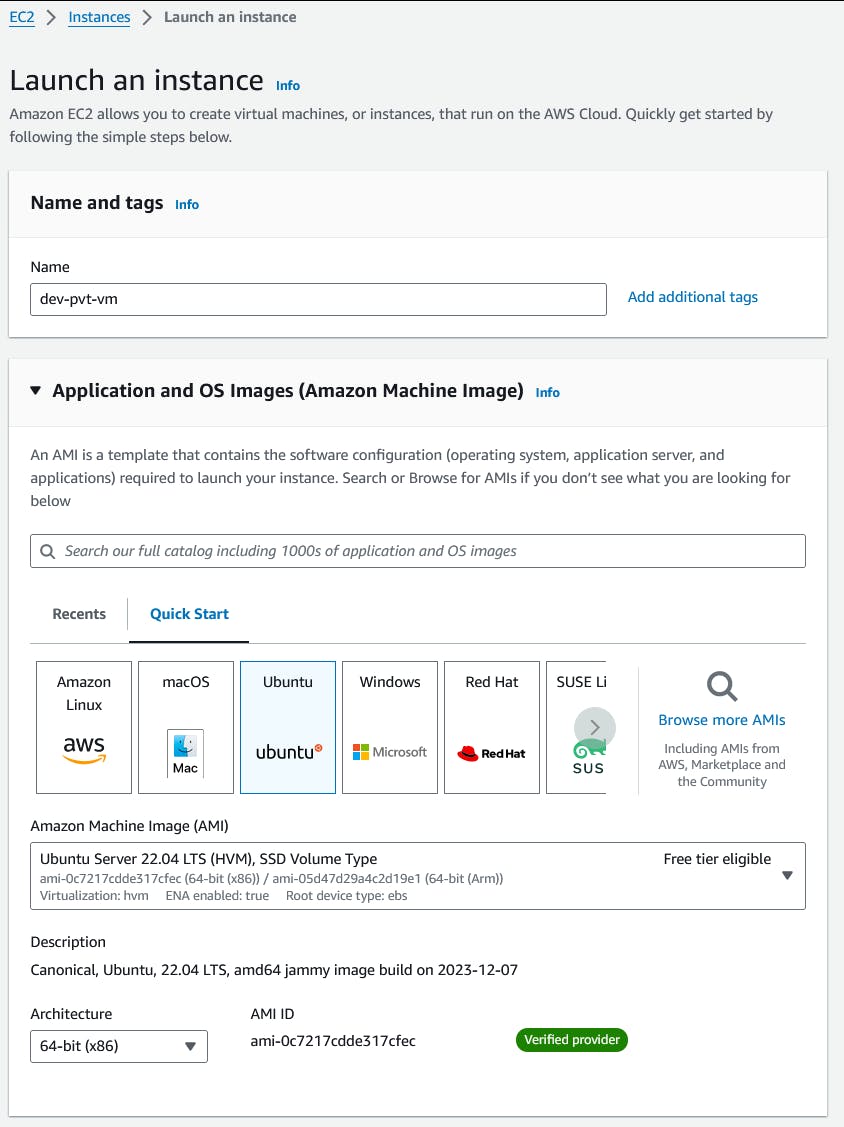
Create a new instance by clicking the Launch an instance button
Name: dev-pvt-vm
AMI: Ubuntu 22.04 LTS
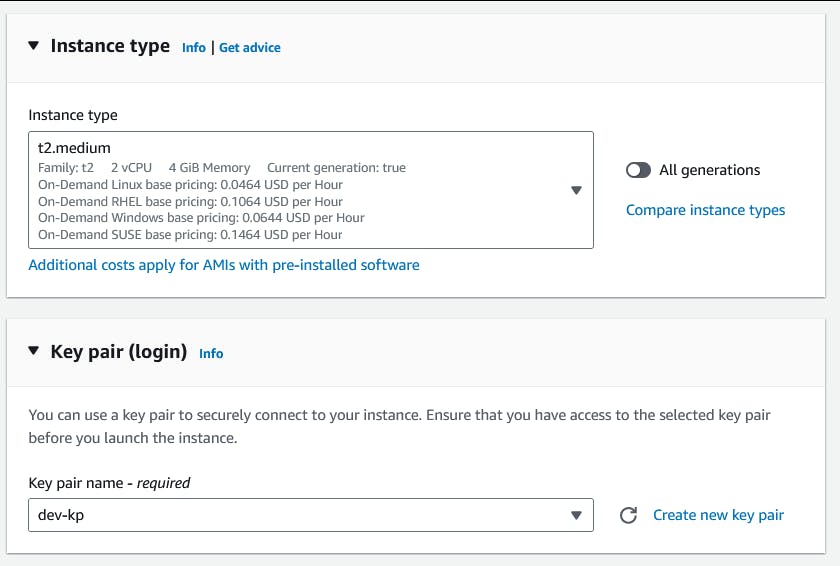
Select Instance type and Key pair for our instance
Instance type: t2.medium
Key pair: dev-kp
Configure Network settings for our instance
VPC: dev-vpc
Subnet: dev-pvt-1
Firewall (security groups): dev-pvt-vm

For configuring storage, proceed with the default values
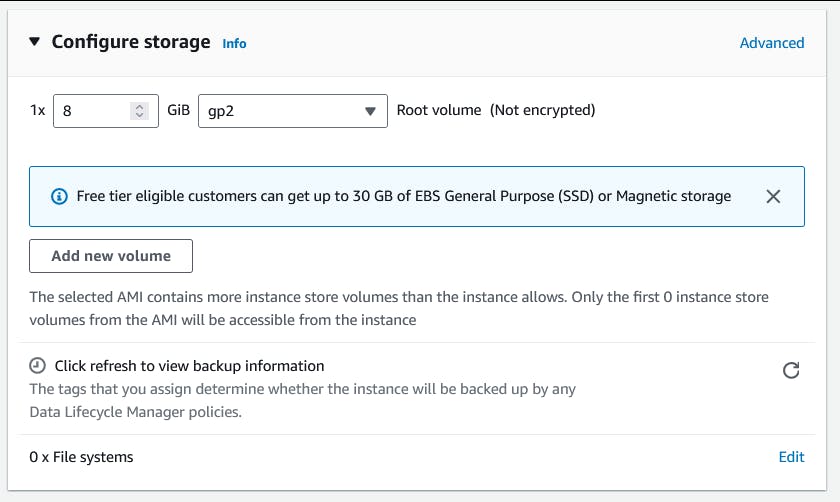
Once everything is ready, click on Launch instance button and our instance will be created
Verify the instance is up and running

Copy the PEM file to dev-pub-vm via scp
$ scp -i dev-kp.pem dev-kp.pem ubuntu@3.235.42.161:/home/ubuntu dev-kp.pem
Login to public instance
$ ssh -i dev-kp.pem ubuntu@3.235.42.161

ubuntu@ip-10-0-7-213:~$ ls
dev-kp.pem
Connect to private instance via SSH
ubuntu@ip-10-0-7-213:~$ ssh -i dev-kp.pem ubuntu@10.0.86.45
ubuntu@ip-10-0-86-45:~$ ping -c 1 google.com
PING google.com (172.253.62.101) 56(84) bytes of data.
64 bytes from bc-in-f101.1e100.net (172.253.62.101): icmp_seq=1 ttl=103 time=2.45 ms

--- google.com ping statistics ---
1 packets transmitted, 1 received, 0% packet loss, time 0ms
rtt min/avg/max/mdev = 2.454/2.454/2.454/0.000 ms
That's all for now
Reference
https://docs.aws.amazon.com/AWSEC2/latest/UserGuide/concepts.html
Next Steps
Checkout my guide on configuring Pritunl VPN for accessing AWS private resources