
Accessing Private AWS Resources using Pritunl VPN
In this guide we look how we can access AWS private resources by configuring Pritunl VPN


Table of contents
Prerequisites
Please check my previous guide on setting up public and private EC2 instances
Configuration
Login to the public EC2 instance
ssh -i dev-kp.pem ubuntu@3.235.42.161
Add the Pritunl repository for downloading the packages
sudo tee /etc/apt/sources.list.d/pritunl.list << EOF
deb http://repo.pritunl.com/stable/apt jammy main
EOF
Import the signing key for the Pritunl repository
sudo apt-key adv --keyserver hkp://keyserver.ubuntu.com --recv 7568D9BB55FF9E5287D586017AE645C0CF8E292A
Add the MongoDB repository for downloading the packages
sudo tee /etc/apt/sources.list.d/mongodb-org-6.0.list << EOF
deb https://repo.mongodb.org/apt/ubuntu jammy/mongodb-org/6.0 multiverse
EOF
Add the signing key for the MongoDB repository
wget -qO - https://www.mongodb.org/static/pgp/server-6.0.asc | sudo apt-key add -
Update and upgrade the packages
sudo apt update

sudo apt --assume-yes upgrade
Install the required packages for WireGuard server support
sudo apt -y install wireguard wireguard-tools
Disable UFW firewall in our instance
sudo ufw disable
Install the Pritunl and MongoDB packages
sudo apt -y install pritunl mongodb-org
Start and enable Pritunl and MongoDB service
sudo systemctl enable mongod pritunl

sudo systemctl start mongod pritunl
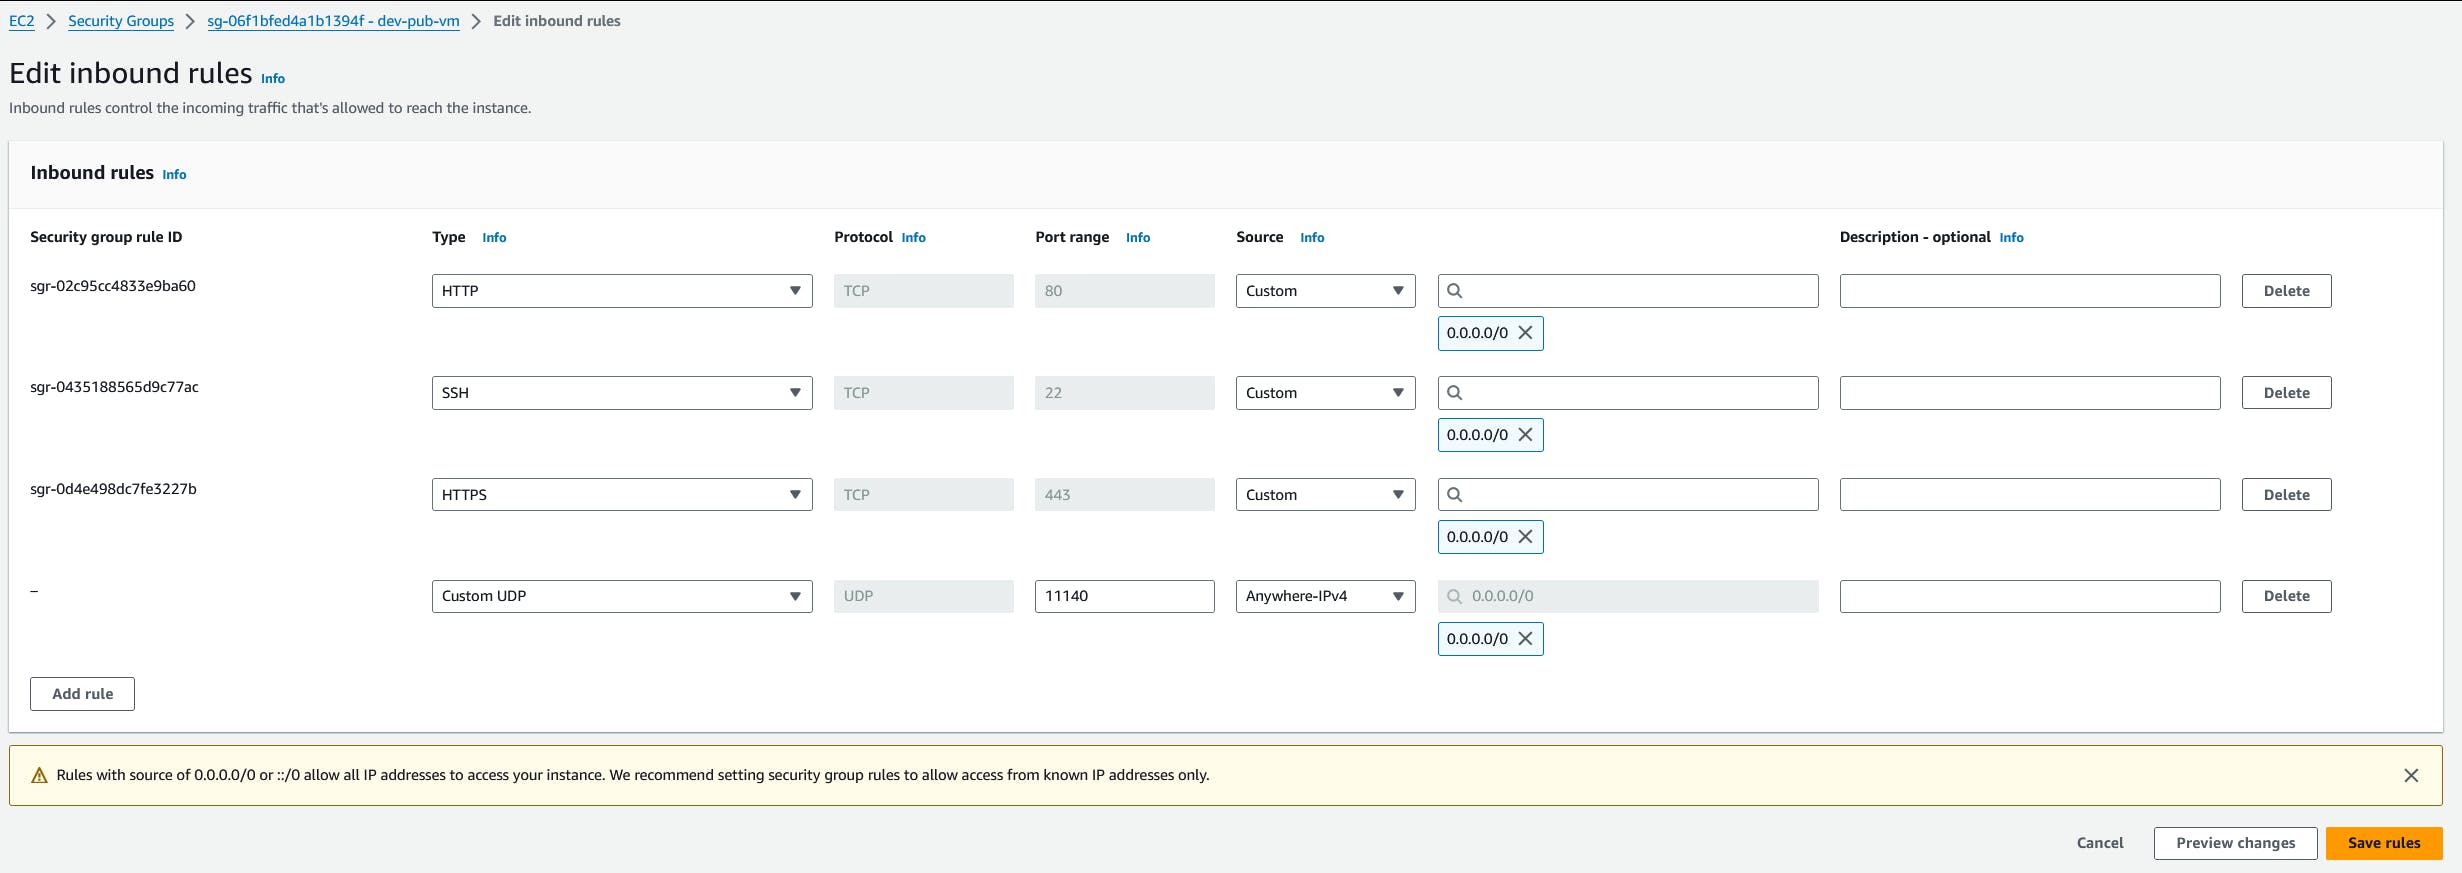
Open port 80 and 443 in the security group of public EC2 instance, these ports are required for accessing Pritunl dashboard

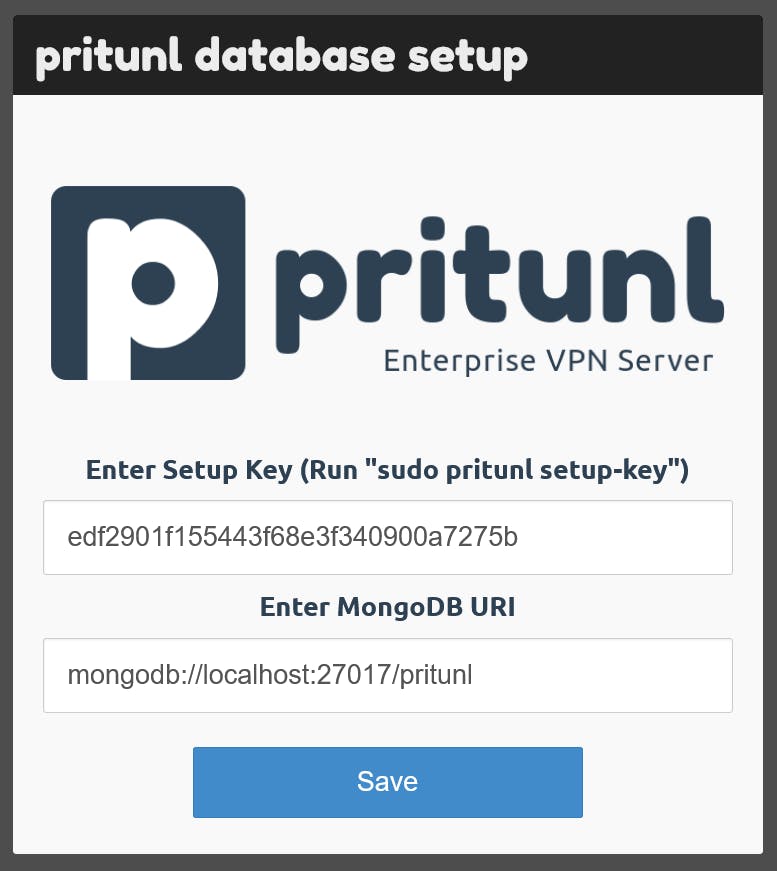
Generate the setup key for initializing the Pritunl database
sudo pritunl setup-key
Access the Pritunl dashboard using the public IP address of the instance and provide the generated setup key
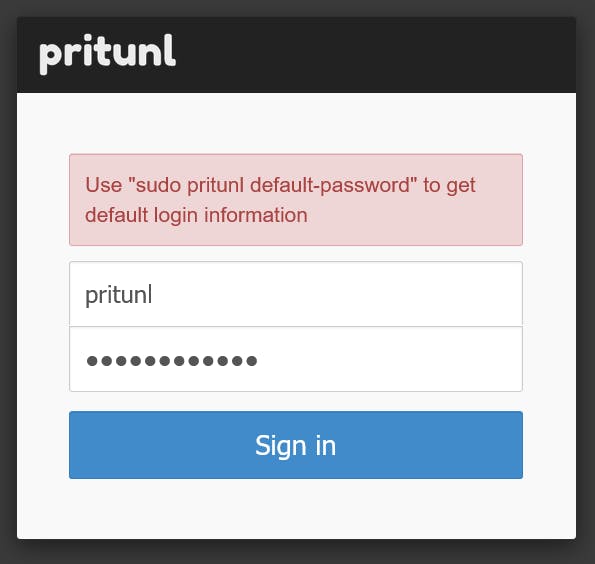
Generate the default password for our Pritunl
sudo pritunl default-password
Login using the default username and password
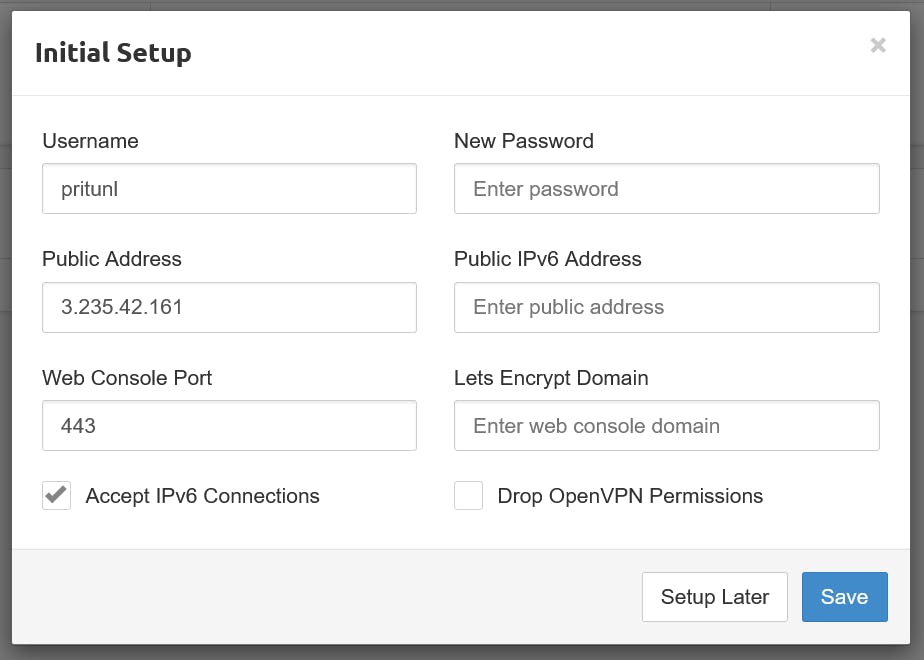
Once logged in a pop up will appear like below and click Save
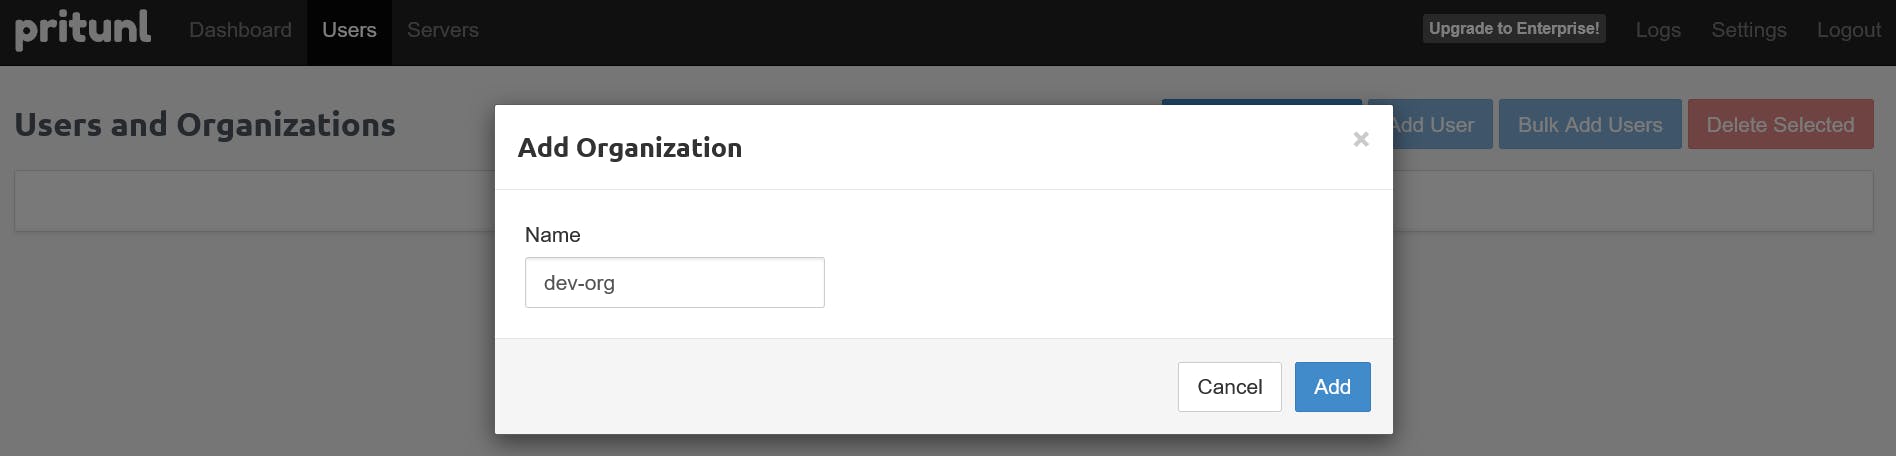
Add a new organization in Pritunl by navigating to Users -> Add Organization
Add a new Server in Pritunl by navigating to Servers -> Add Server
Note down the port and protocol, we need to add the same in the security group of our public EC2 instance

Add the UDP port from Pritunl in the security group of our public EC2 instance
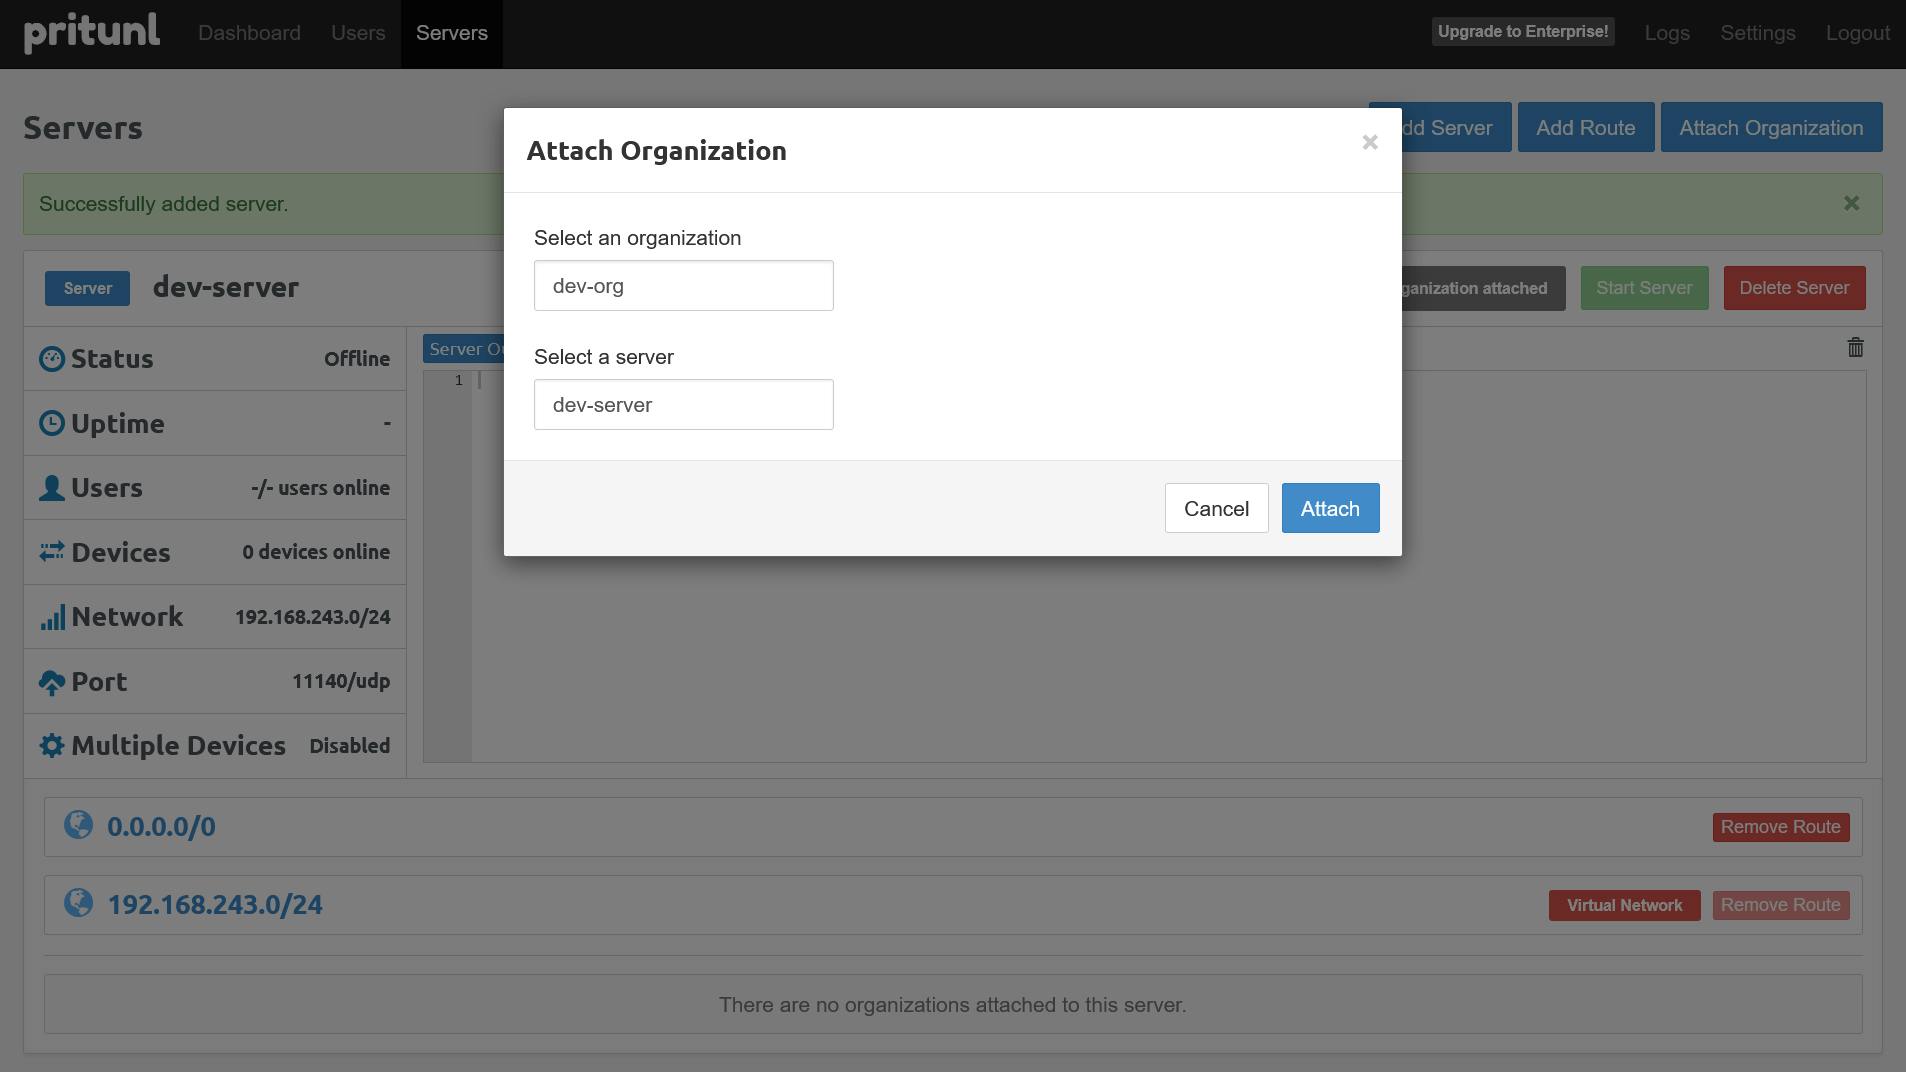
Attach our created Pritunl Organization to Server
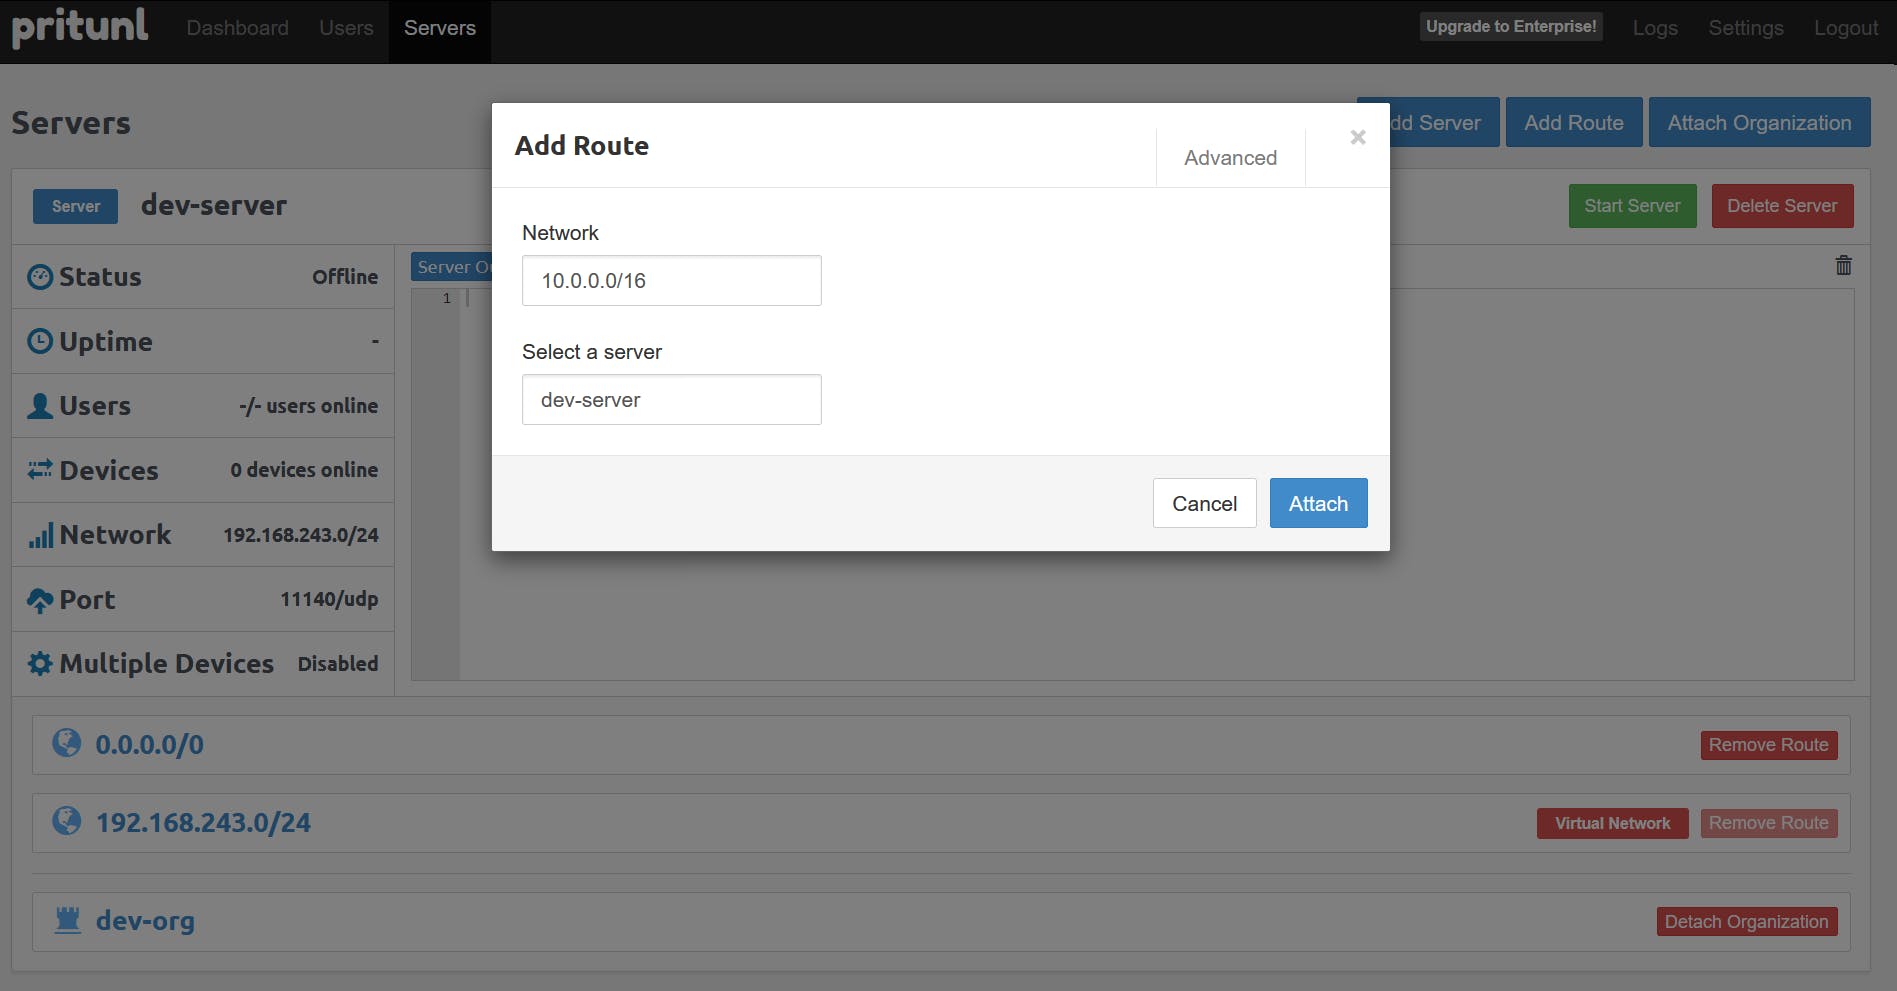
Click on Add Route option to add our VPC CIDR block as route
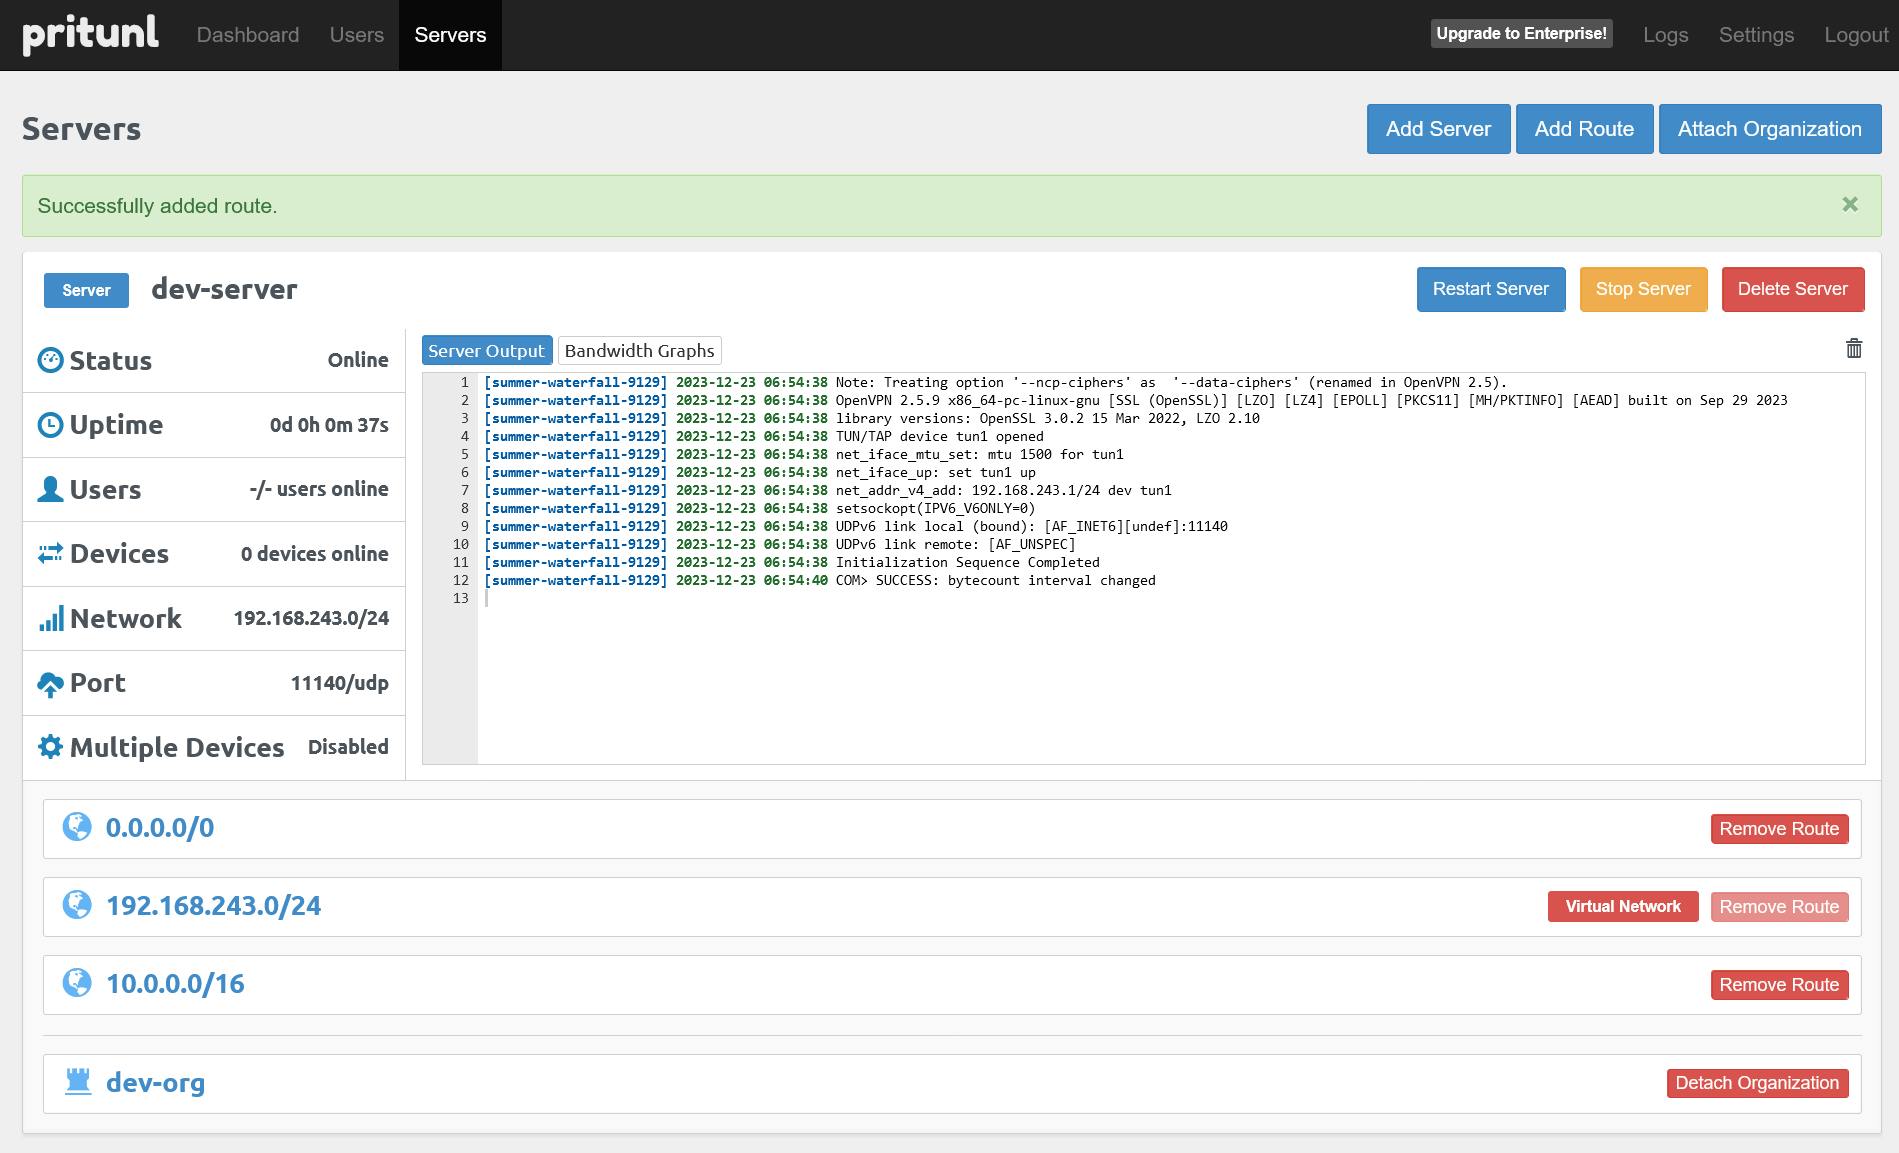
Once done, click on Start Server option to start the Pritunl Server
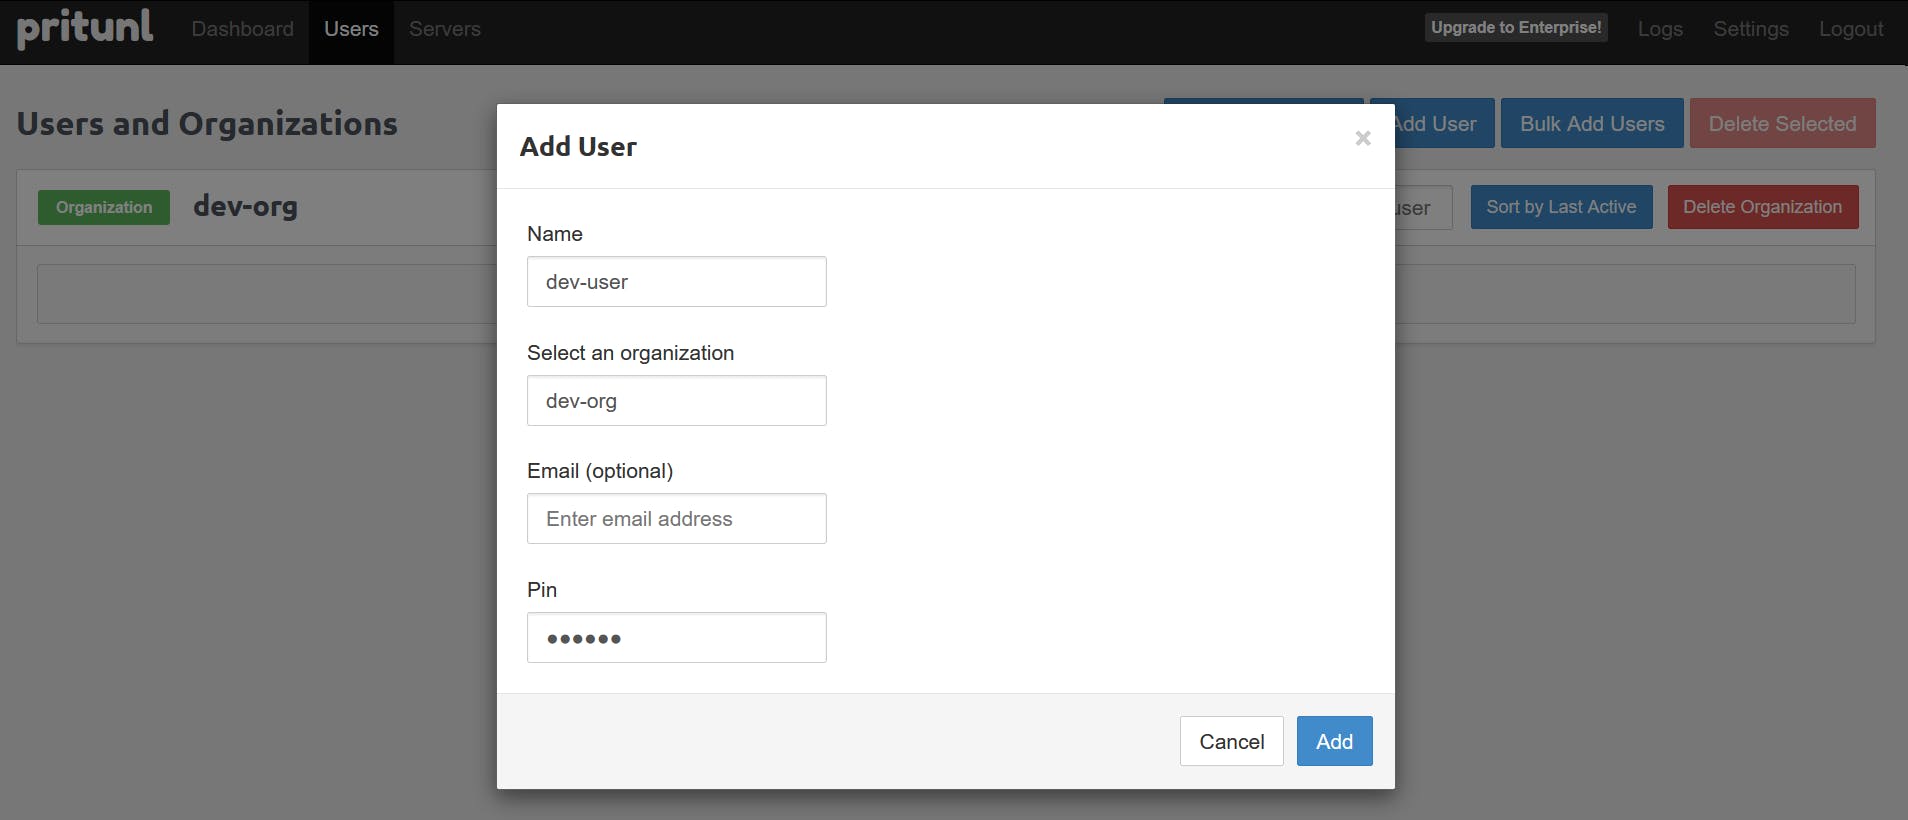
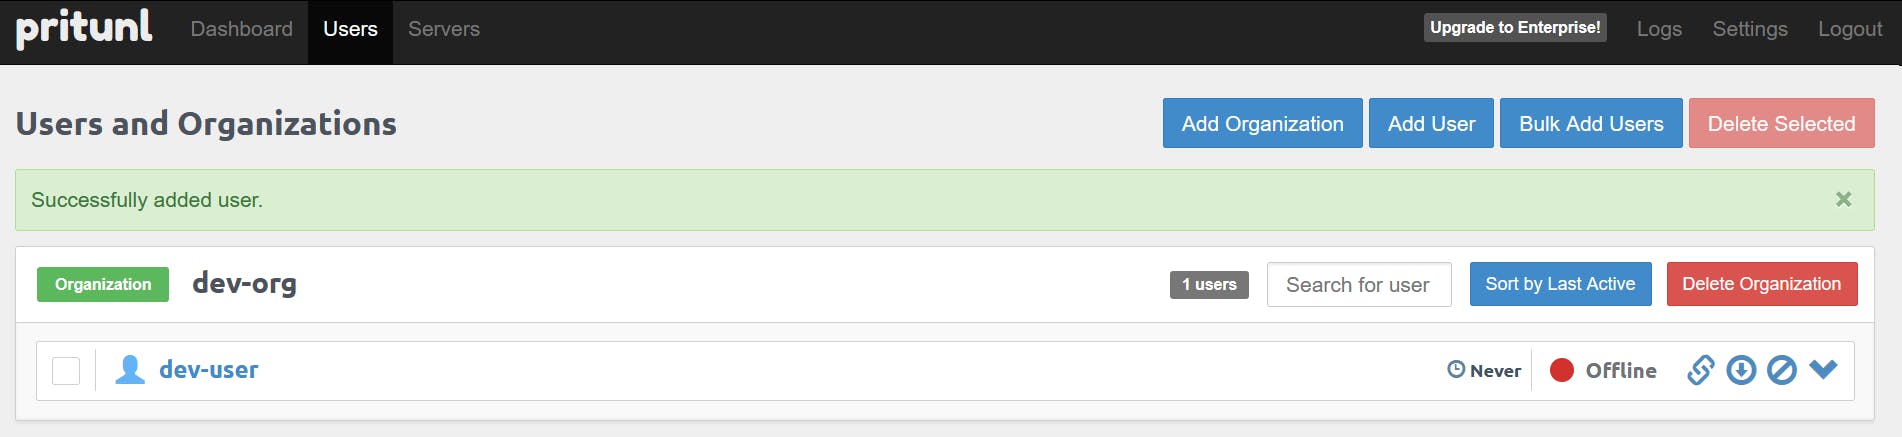
Create a VPN user by navigating to Users -> Add User and enter a PIN
Once the user is created, download the VPN profile
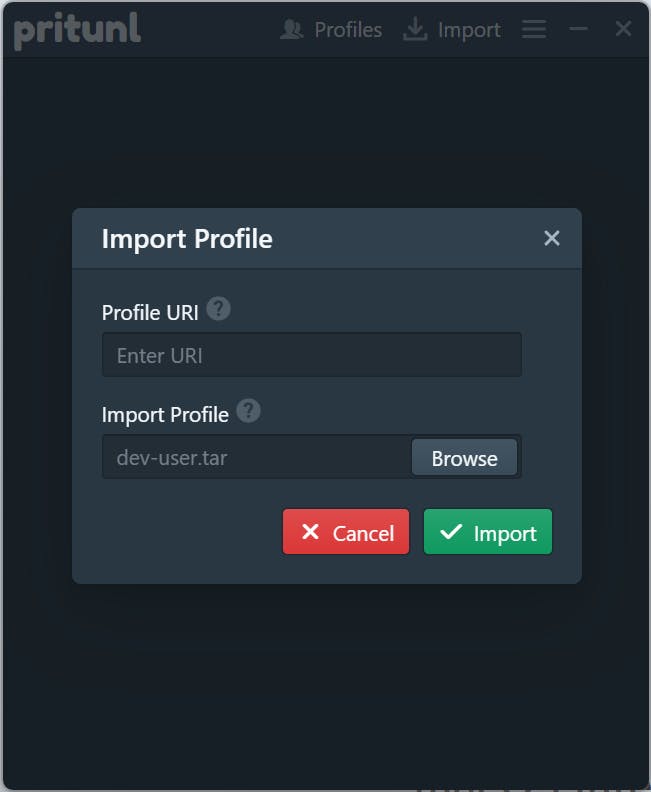
In our local laptop or desktop, download the Pritunl VPN Client and Import our downloaded profile
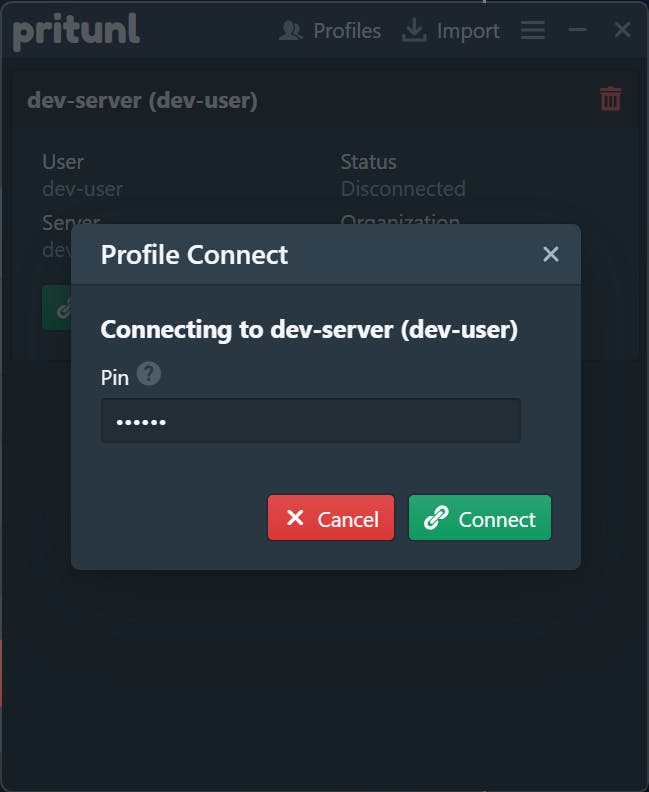
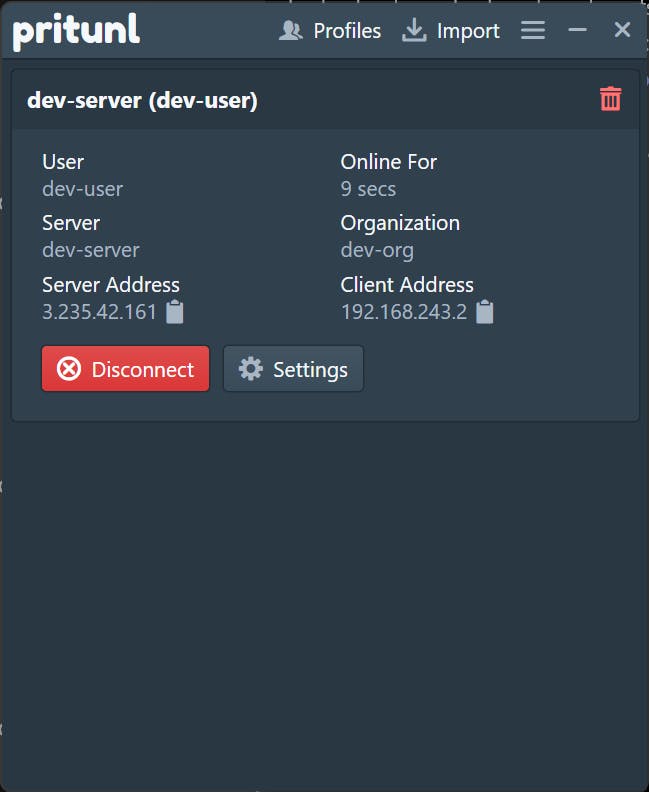
Connect the VPN by entering the PIN of the user
Now our VPN connection is established
Connect to our private EC2 instance using the private IP address
$ ssh -i dev-kp.pem ubuntu@10.0.86.45
The authenticity of host '10.0.86.45 (10.0.86.45)' can't be established.
ED25519 key fingerprint is SHA256:Zw6QAU+AMNSn+sV7eEooL/k+n33y54GpeeLqta2UTvA.
This key is not known by any other names.
Are you sure you want to continue connecting (yes/no/[fingerprint])? yes
Warning: Permanently added '10.0.86.45' (ED25519) to the list of known hosts.
Welcome to Ubuntu 22.04.3 LTS (GNU/Linux 6.2.0-1017-aws x86_64)

 * Documentation:  https://help.ubuntu.com
 * Management:     https://landscape.canonical.com
 * Support:        https://ubuntu.com/advantage

  System information as of Sat Dec 23 07:02:36 UTC 2023

  System load:  0.080078125       Processes:             105
  Usage of /:   20.8% of 7.57GB   Users logged in:       0
  Memory usage: 5%                IPv4 address for eth0: 10.0.86.45
  Swap usage:   0%


Expanded Security Maintenance for Applications is not enabled.

0 updates can be applied immediately.

Enable ESM Apps to receive additional future security updates.
See https://ubuntu.com/esm or run: sudo pro status


The list of available updates is more than a week old.
To check for new updates run: sudo apt update

Last login: Sat Dec 23 06:09:34 2023 from 10.0.7.213
To run a command as administrator (user "root"), use "sudo <command>".
See "man sudo_root" for details.

ubuntu@ip-10-0-86-45:~$
That's all for now
References
https://docs.pritunl.com/docs/installation#other-providers-ubuntu-2204