

Table of contents


No headings in the article.
In this article, we are going to create an EKS cluster using eksctl.
From the official documentation, Amazon Elastic Kubernetes Service (EKS) is a managed Kubernetes service to run Kubernetes in the AWS cloud. In the cloud, Amazon EKS automatically manages the availability and scalability of the Kubernetes control plane nodes responsible for scheduling containers, managing application availability, storing cluster data, and other key tasks. With Amazon EKS, you can take advantage of all the performance, scale, reliability, and availability of AWS infrastructure, as well as integrations with AWS networking and security services.
Refer: https://aws.amazon.com/eks/
eksctl is the official CLI for Amazon EKS. It is a simple CLI tool for creating and managing clusters on EKS - Amazon's managed Kubernetes service for EC2. It is written in Go, uses CloudFormation, was created by Weaveworks.
Refer: https://eksctl.io/
Please note that the Linux distribution used here to setup the local environment is Ubuntu 20.04.
Install the prerequisite tools.
$ sudo apt update

$ sudo apt install curl unzip
Download and install AWS CLI.
$ curl "https://awscli.amazonaws.com/awscli-exe-linux-x86_64.zip" -o "awscliv2.zip"

$ unzip awscliv2.zip

$ ./aws/install -i /usr/local/aws-cli -b /usr/local/bin

$ aws --version
Download and install eksctl.
$ curl --location "https://github.com/weaveworks/eksctl/releases/latest/download/eksctl_$(uname -s)_amd64.tar.gz" | tar xz -C $PWD

$ sudo install eksctl /usr/local/bin/eksctl

$ eksctl version
Download and install kubectl.
$ curl -LO https://dl.k8s.io/release/v1.23.7/bin/linux/amd64/kubectl

$ sudo install kubectl /usr/local/bin/kubectl

$ kubectl version --client
Configure AWS CLI with access key, secret key, region and output format.
$ aws configure
AWS Access Key ID [None]: xxxxxx
AWS Secret Access Key [None]: xxxxxx
Default region name [None]: us-east-1
Default output format [None]: yaml
Create the cluster using the below configuration file. The cluster creation will take around 15 minutes to complete.
$ cat dev-eks.yml
apiVersion: eksctl.io/v1alpha5
kind: ClusterConfig

metadata:
  name: dev-cluster
  region: us-east-1
  version: "1.23"

vpc:
  cidr: 10.0.0.0/16

managedNodeGroups:
- name: dev-node
  amiFamily: Ubuntu2004
  instanceType: t3.micro
  desiredCapacity: 2
$ eksctl create cluster -f dev-eks.yml
When you execute the above cluster creation command, it will uses CloudFormation in the backend to create the necessary resources. In the image below, you can see two CloudFormation Stacks are created for provisioning control plane and node group.

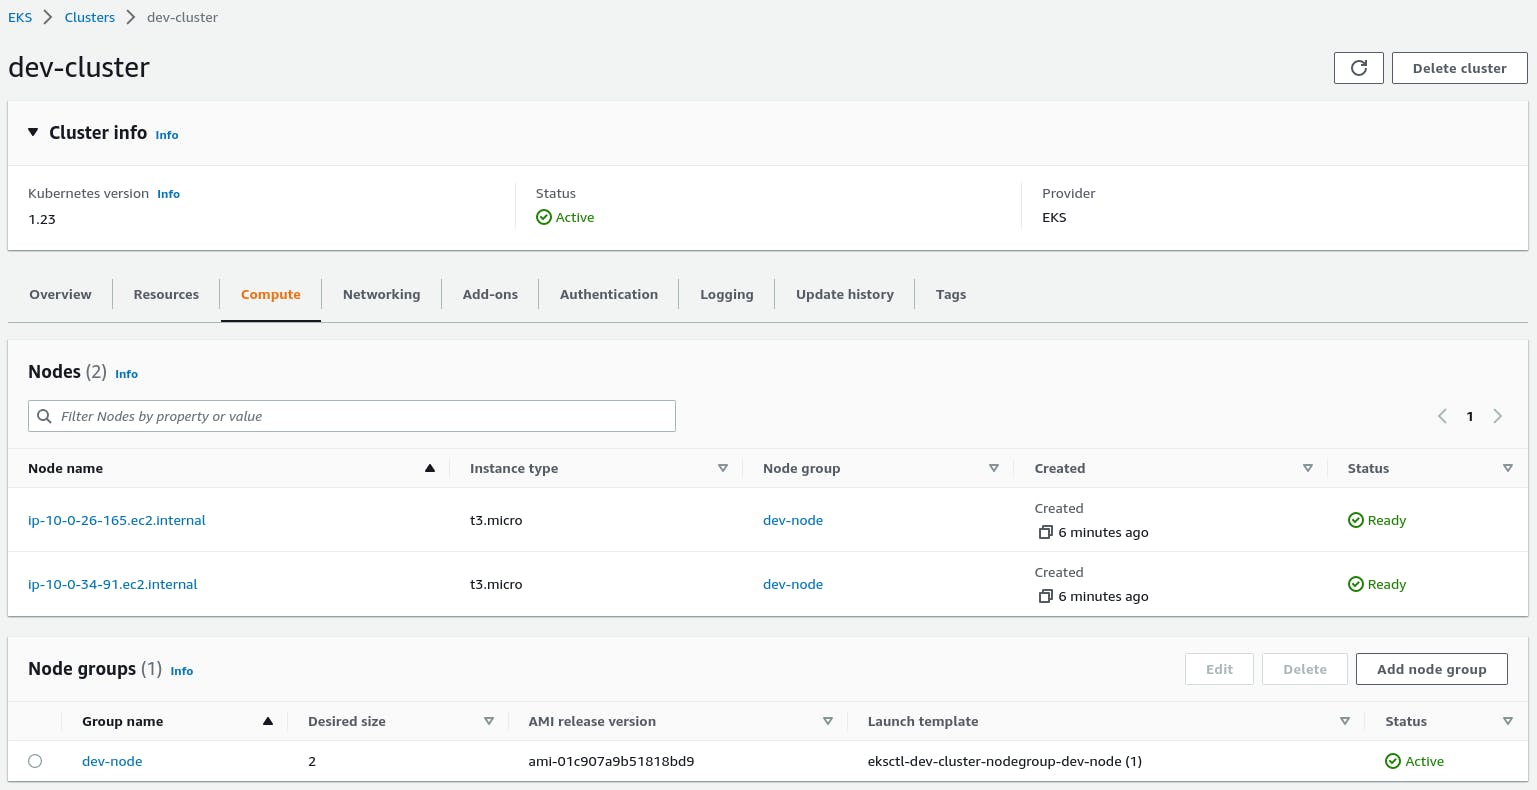
We can see our cluster status in EKS console, it is active and all the nodes are in the ready state.
Connect to our cluster for deploying our workloads.
$ aws eks --region us-east-1 update-kubeconfig --name dev-cluster

$ kubectl get nodes
NAME                          STATUS   ROLES    AGE   VERSION
ip-10-0-26-165.ec2.internal   Ready    <none>   18m   v1.23.7
ip-10-0-34-91.ec2.internal    Ready    <none>   18m   v1.23.7
Create an Nginx pod and check it's status.
$ kubectl run nginx --image=nginx:1.23 --port 80
pod/nginx created

$ kubectl get pods
NAME    READY   STATUS    RESTARTS   AGE
nginx   1/1     Running   0          64s
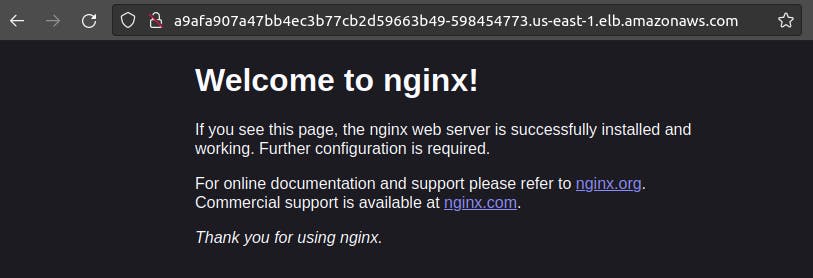
Expose the Nginx pod to a LoadBalancer service.
$ kubectl expose pod nginx --name=nginx-lb --port=80 --target-port=80 --type=LoadBalancer
service/nginx-lb exposed

$ kubectl get svc
NAME         TYPE           CLUSTER-IP     EXTERNAL-IP                                                              PORT(S)        AGE
kubernetes   ClusterIP      172.20.0.1     <none>                                                                   443/TCP        35m
nginx-lb     LoadBalancer   172.20.61.15   a9afa907a47bb4ec3b77cb2d59663b49-598454773.us-east-1.elb.amazonaws.com   80:32165/TCP   41s
Copy the URL found in the EXTERNAL-IP section and verify it in a browser.
We can also delete our cluster using eksctl command.
$ eksctl delete cluster -f dev-eks.yml --wait
That's all for now, thank you!